The Invisible Threats That Lead to Expensive Repairs
Why Hidden Storm Damage Is the Real Threat
When a storm rolls through the Willamette Valley, most homeowners scan their roofs for the obvious signs of damage: missing shingles scattered across the lawn, visible dents in metal flashing, or branches that have punctured through the surface. But a decade of storm damage roof repair experience across Salem and surrounding communities has revealed a critical truth: the damage that makes itself known is rarely the damage that creates financial catastrophe. The real threats are the silent vulnerabilities hiding beneath your shingles, the hairline cracks in flashing that expand with every freeze-thaw cycle, the saturated underlayment quietly rotting your roof deck while you remain unaware that anything is wrong because nothing appears broken from street level.
Hidden storm damage operates on a completely different timeline than a missing shingle. That compromised valley flashing might take six months before it reveals itself as a bedroom ceiling stain. Those wind-lifted shingle edges that appeared to reseal themselves after the storm passed? They’ve already broken their adhesive bond, and now every winter rainstorm becomes an opportunity for moisture to infiltrate beneath your roof’s protective barrier. In Oregon’s climate, where weeks of sustained rainfall can be followed by sudden temperature drops, these concealed vulnerabilities don’t remain dormant. They actively deteriorate, transforming a two-hundred-dollar flashing repair into a four-thousand-dollar deck replacement because the problem remained invisible until it reached catastrophic proportions. What makes storm damage particularly destructive in the Salem area is how our weather patterns exploit even minor vulnerabilities. A typical Willamette Valley winter delivers not one dramatic storm but a relentless succession of wet systems, each depositing moisture on a roof that may not have completely dried from the previous weather front. When wind gusts lift a shingle edge during a January storm, that edge might not tear away completely. Instead, it creates a small gap, a vulnerability that remains invisible from ground level but functions as a water channel during subsequent rainfall events. Over the course of a single wet season, that one compromised shingle can funnel hundreds of gallons of water into your underlayment, where it saturates the felt, soaks into the roof deck, and begins the gradual process of rot and structural degradation.
The financial stakes are direct and substantial: early detection of hidden damage typically means repair costs in the hundreds of dollars, while damage discovered too late often runs into the thousands or tens of thousands once water has compromised structural elements, insulation, and interior finishes. Beyond the monetary impact, there’s a safety dimension that cannot be ignored. Saturated roof decking loses its structural integrity over time. Prolonged moisture exposure creates mold that degrades indoor air quality and poses health risks. A roof that appears sound from the street but harbors hidden storm damage is a roof that’s quietly failing its primary function of protecting your family and preserving your home’s value. That’s why systematic inspection after any major storm is not optional maintenance but damage control with a critical timeline. The sooner you identify what the storm actually accomplished rather than what it appeared to do, the more money you preserve and the safer your home remains. Our roofing services include comprehensive post-storm assessments precisely because too many Salem homeowners discover hidden damage only after it has escalated into an emergency situation that could have been prevented with early professional intervention.
Ground-Level Inspection
You don’t need a ladder to begin your post-storm roof inspection. In fact, some of the most telling evidence of hidden damage is visible from your driveway, yard, and the ground around your home’s perimeter. Start by walking the full perimeter of your property with your eyes trained upward, scanning the roofline from multiple angles. You’re looking for any visual irregularities: shingles that appear darker than their neighbors (often a sign of moisture retention or lost granules), sections of roof that sag or dip even slightly, flashing around chimneys or where the roof meets vertical walls that looks bent, lifted, or separated from the surface it’s supposed to protect.
Pay special attention to the north-facing slopes of your roof if you’re in the Salem area. These sections receive less direct sunlight and stay damp longer after our frequent winter rains, making them prime real estate for moss colonization that accelerates after storms. While moss itself isn’t storm damage, a major weather event often dislodges existing moss colonies, and the bare patches left behind reveal whether shingles underneath have been compromised. If you spot areas where moss was torn away and the shingles look abraded, cracked, or curled, that’s hidden damage the storm exposed rather than caused, but it still requires attention before the next storm season.
Your gutters tell a story that’s easy to miss if you’re not reading carefully. After a significant storm, check your gutters and downspouts for an accumulation of shingle granules. Those granules are the protective layer that shields your roof from UV damage and water penetration. A small amount of granule shedding is normal over a roof’s lifespan, but a sudden concentration of dark, sand-like material in your gutters after a storm indicates that high winds, hail, or impact from debris has accelerated granule loss. This is textbook hidden damage: the shingles may still be attached and look intact from a distance, but they’ve lost a critical layer of protection and are now aging at an accelerated rate.
Walk your yard and look for debris that wasn’t there before the storm. In the Willamette Valley, our towering Douglas firs and other native trees shed branches during windstorms, and even a branch that didn’t puncture through your roof may have impacted it with enough force to crack shingles, bruise the underlayment, or damage flashing. Check for shingle fragments, pieces of flashing, or sections of ridge cap in your landscaping. Each piece you find on the ground is a piece that’s no longer protecting your roof. Make a checklist: missing shingles, granule accumulation, visible sagging, damaged flashing, debris impacts, and moss disturbance. Document what you find with photos and notes, because even if you’re planning to have a professional roofing contractor conduct a thorough inspection, your ground-level observations provide valuable starting points for where to look more closely.
Attic and Interior Inspection
Your attic is where hidden roof damage reveals itself before it reaches your living spaces, making it one of the most valuable diagnostic spaces in your home after a storm. Grab a flashlight (a bright LED headlamp is even better, as it keeps your hands free) and head into your attic during daylight hours if possible. Safety first: walk only on structural framing or installed flooring, never on insulation or drywall, which won’t support your weight. If your attic access is limited or unsafe to navigate, this is a strong signal to call in a professional for the interior portion of your inspection.
Once you’re safely positioned, turn off your flashlight and let your eyes adjust to the darkness. Look up at the underside of your roof decking. Any pinpricks or streaks of daylight shining through are red flags. While tiny nail pops from initial construction are sometimes normal, new light penetration after a storm often indicates that wind uplift has separated sheathing from rafters, that fasteners have backed out, or that the roof structure has shifted. In Oregon homes, where composition shingles over OSB or plywood decking are standard, even small structural movements can compromise the waterproof integrity of your system.
Turn your flashlight back on and systematically scan the underside of the roof deck for water stains, which typically appear as dark streaks, discolored patches, or areas where the wood looks darker than surrounding sections. Pay extra attention to valleys (where two roof planes meet), around chimney chases, and near any roof penetrations like vent pipes or skylights. These are the highest-stress points during a storm and the most common failure points for flashing systems. If you find a water stain, touch the area gently. Is it dry and old, or damp and recent? Fresh moisture after a recent storm is confirmation that water is getting past your roof’s defenses right now, even if you haven’t seen a ceiling stain inside your home yet.
Look for more subtle signs too: insulation that appears compressed, discolored, or damp; mold or mildew growth on rafters or decking (it often appears as black or dark green spots or fuzzy patches); a musty odor that wasn’t present before the storm; or rust stains around nail shanks poking through the decking. Each of these indicates that moisture has entered your attic space. During Salem’s rainy season, which stretches from October deep into April, even a small roof breach can introduce significant moisture into your attic environment, creating conditions for mold growth and wood rot that compromise your home’s structural integrity and indoor air quality.
If you discover any of these warning signs during your attic inspection, document them with photos and make note of their locations. While you’re gathering this information, it’s also worth checking your interior ceilings throughout the house for new stains, bubbling paint, or soft spots, particularly in rooms directly below the roof areas where you found attic evidence of water intrusion. These interior inspections are something any homeowner can safely perform, and they provide critical data that helps a roof repair service like ours target exactly where the storm caused damage, making the professional assessment more efficient and accurate.
Safe Roof-Surface Inspection
Let’s address the elephant on the roof: should you climb up there yourself after a storm? The honest answer is that it depends on your comfort level, your roof’s pitch, the weather conditions, and what you’re looking for. Roofs are dangerous workspaces, and every year homeowners are seriously injured in falls that were entirely preventable. If your roof is steeply pitched (most residential roofs in the Salem area range from 4/12 to 8/12 pitch), if it’s wet or moss-covered (extremely common on our north-facing slopes), if you don’t have proper footwear with excellent traction, or if you’re uncomfortable with heights, do not attempt a roof-surface inspection yourself. The cost of a professional inspection is a fraction of a medical bill or worse.
That said, if you have a lower-pitch roof, it’s a dry day, you have a safe and stable ladder that extends at least three feet above your roofline, and you’re confident in your ability to move carefully on a sloped surface, there are storm-damage indicators you can look for from the roof surface that aren’t visible from the ground or attic. Always follow ladder safety protocols: maintain three points of contact, have someone spot you from the ground, and never work alone. Wear rubber-soled shoes with good grip, avoid walking on wet or frost-covered shingles, and remember that asphalt shingles can be slippery even when they appear dry.
Once on the roof, start by examining the shingles themselves in the areas most exposed to prevailing winds. In the Willamette Valley, our winter storms typically arrive from the southwest, meaning south and west-facing roof planes take the brunt of wind-driven rain and wind uplift. Look for shingles that appear lifted at the edges or corners. Even if they’ve resealed after the wind subsided, a lifted shingle often shows a crease or a slight curl that wasn’t there before. Run your hand gently along the bottom edge of shingles in suspect areas. Do they feel securely adhered, or is there give and movement? Shingles that have been wind-lifted and resealed are compromised; the adhesive seal has been broken, and they’re now more vulnerable to future wind events and water infiltration.
Inspect all flashing closely. This includes the metal or composite material around your chimney, in valleys where two roof planes meet, around vent pipes, along edges where your roof meets a vertical wall (called step flashing), and at the drip edge along your roof’s perimeter. Storm winds can bend flashing, pull it away from the surfaces it’s meant to seal, or crack it entirely. Look for gaps, separations, bent corners, or any place where you can see underneath the flashing to the roof deck below. These are pathways for water, and in Oregon’s climate where we can receive sustained rainfall for days at a time, even a small flashing failure will channel significant water volume into your roof system.
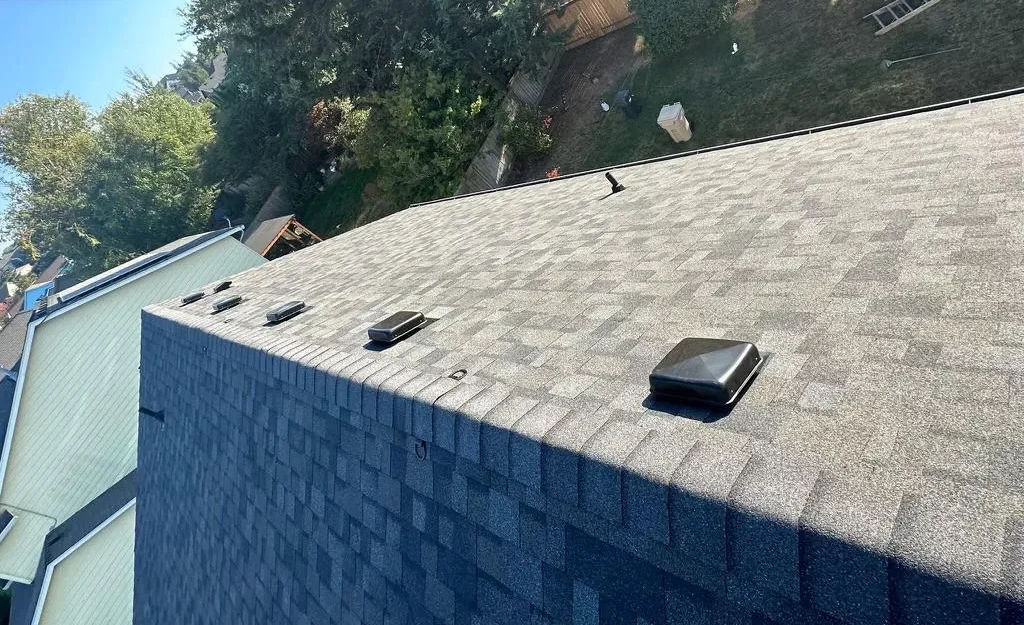
Check your ridge cap (the shingles that run along the peak of your roof) for damage. Ridge caps are particularly vulnerable to wind uplift because they’re fully exposed to weather from all directions. Look for missing sections, lifted edges, or cracks. Examine all roof penetrations: vent pipes, skylights, and exhaust vents. The rubber boots that seal around vent pipes can crack or tear during extreme weather, and skylight flashing systems can separate from the roof deck if winds are strong enough. Look for punctures or impact damage from fallen branches. Even if a branch didn’t fully penetrate your roof, the impact may have cracked shingles or fractured the underlayment beneath, creating a future leak point.
Here’s the reality: even if you’re comfortable getting on your roof, there are limits to what an untrained eye can spot. Subtle underlayment damage, microcracks in flashing, fastener failures hidden under shingle overlaps, and early-stage wood decay are all forms of storm damage that require the trained eye of an experienced roofing contractor to diagnose. That’s not a sales pitch; it’s a recognition that we spend our days on roofs across the Salem metro area and the greater Willamette Valley, and pattern recognition is built through repetition. If your ground-level, attic, and surface inspections have revealed any concerning signs, or if you simply want the confidence that comes from a professional assessment, that’s a wise investment in your home’s protection and your family’s safety.
What to Do Next
You’ve completed your inspection, and now you’re standing in your driveway with photos on your phone, notes about what you found, and a decision to make: what happens next? The answer depends on what your inspection revealed, but the underlying principle is universal: timely action on storm damage saves you money, protects your home’s value, and prevents small problems from becoming catastrophic failures. Let’s break down the most common scenarios and the appropriate responses.
If your inspection found clear evidence of damage (missing shingles, visible flashing failures, water stains in the attic, lifted or cracked roofing materials), your next call should be to a qualified residential roofing contractor who offers storm damage assessment and repair. Not all roofing companies are equal in this space. Look for a contractor with specific experience in storm damage evaluation, a solid track record in your local area, proper licensing and insurance, and the ability to work with your homeowner’s insurance if a claim is warranted. At PRL Construction LLC, we’ve spent more than a decade repairing storm-damaged roofs throughout Salem and surrounding communities, and that experience matters because we know exactly where Oregon weather tends to cause damage, what insurance companies look for in claims documentation, and how to execute repairs that restore your roof’s integrity without unnecessary scope creep.
When you schedule a professional storm damage inspection with our team, here’s what happens: we conduct a systematic examination that mirrors the process you’ve already started but with the tools, training, and experience to catch what homeowner inspections typically miss. We document everything with detailed photos and notes. We provide you with a clear, written assessment that explains what damage exists, what caused it, whether it’s storm-related or pre-existing wear, and what repairs are necessary versus recommended. If insurance is involved, we help you navigate that process, providing the documentation your carrier needs and working directly with adjusters to ensure you receive fair treatment. Our goal is not to sell you a new roof if you don’t need one; our goal is to solve the actual problem your storm inspection revealed, whether that’s targeted repairs or, in cases of extensive damage, a full roof replacement.
What if your inspection didn’t reveal obvious damage but you found concerning signs, like moderate granule loss, minor moss disruption, or older wear that the storm may have exacerbated? This is still worth a professional look, particularly if your roof is approaching or past the midpoint of its expected lifespan. A roof that’s eight to ten years old and showing accelerated wear after a storm may be on a faster deterioration timeline than you realize, and getting ahead of that curve is far less expensive than waiting until emergency repairs are required. Think of this professional assessment as an investment in information. You’ll know exactly what condition your roof is in, what its remaining lifespan looks like, and whether proactive repairs or budgeting for future replacement is the smart financial move.
For homeowners whose inspections revealed no significant damage, that’s genuinely good news, but don’t skip documentation. Take dated photos of your roof’s condition after the storm. Note what you looked at and what you found (or didn’t find). This creates a baseline for future inspections and can be valuable if you discover damage later and need to establish when it occurred for insurance purposes. It’s also worth scheduling a professional roof inspection on a regular cadence (every two to three years is a reasonable interval for Oregon homes, or after any major storm event) to catch age-related wear before it becomes a crisis.
Here’s the financial reality: a typical storm damage repair, addressing targeted issues like flashing replacement, shingle repairs, or minor valley work, often costs between a few hundred and a couple thousand dollars depending on scope. Waiting until that hidden damage causes interior leaks, mold growth, or structural rot can easily push costs into the five-figure range once you’re repairing not just the roof but the decking, insulation, drywall, and dealing with mold remediation. The return on investment for early intervention is measured in thousands of dollars saved and countless hours of stress avoided.
If you’ve spotted any of the warning signs we’ve discussed in this guide (granule loss, lifted shingles, flashing damage, water stains, or anything that raises concern), we encourage you to contact us for a thorough storm damage assessment. Our team will provide an honest evaluation and clear recommendations, because we’ve learned through years of storm repair work across the Willamette Valley that the homeowners who fare best are the ones who take action early, ask questions, and work with contractors who treat their homes with the same care we’d expect for our own. Your roof is your home’s first line of defense. After a major storm, make sure that defense is still standing strong.